
Why Laser Cut Edge Discoloration Happens—and How to Prevent It?
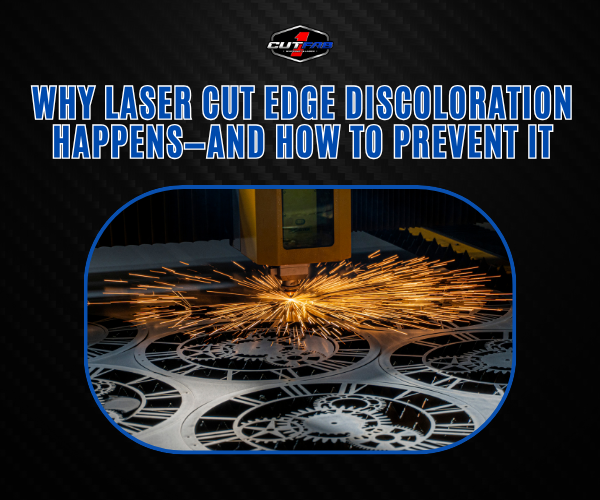
If you’ve ever pulled a freshly laser-cut part from the machine only to find a brown, yellow, or even blue edge—you know the frustration. Laser cut edge discoloration isn’t just a cosmetic nuisance; it can impact part quality, performance, and even customer perception. Whether you’re cutting stainless steel, aluminum, or acrylic, edge discoloration is a common challenge in fabrication shops. The good news? It’s not random. By understanding why it happens—and applying a few proven adjustments—you can dramatically reduce, or even eliminate, the issue. Let’s start by breaking down what edge discoloration really means for your parts and projects.
Causes of Edge Discoloration
When it comes to laser cut edge discoloration, three primary factors are usually at play: oxidation, the heat-affected zone (HAZ), and assist gas effects.
1. Oxidation – When the laser beam melts material, the exposed hot metal reacts with oxygen in the air or from the assist gas. This reaction leaves behind oxides that can appear as yellow, brown, or even black marks along the cut edge. The effect is most noticeable in stainless steel, where chromium oxidation changes surface color.
2. Thermal Zone – The laser doesn’t just cut; it also creates intense localized heat. This heat-affected zone alters the surface finish at the cut line. For metals, high heat can cause surface tinting; for plastics like acrylic, it can cause yellowing or hazing.
3. Assist Gas Effects – Using oxygen as an assist gas can speed up cutting but often worsens discoloration due to higher oxidation levels. Nitrogen, on the other hand, produces cleaner edges but may slow production and increase cost.
Material-Specific Behavior – Stainless steel tends to show straw or rainbow discoloration; carbon steel can appear dark and sooty; acrylic can yellow or develop micro-cracks from heat stress. Each material demands different cutting parameters to minimize these issues.
Understanding these causes is the first step toward preventing laser cut edge discoloration—because once you know the “why,” it’s much easier to fix the “how.”
Material Preparation Techniques
One of the most overlooked yet effective ways to reduce laser cut edge discoloration starts long before the laser ever fires—material preparation. Clean, well-prepared materials not only cut better but also resist oxidation and surface staining.
1. Pre-Cleaning Methods – Dust, oil, fingerprints, and shop debris can all contribute to discoloration. Before cutting, wipe down metal sheets with a lint-free cloth and an appropriate solvent like isopropyl alcohol. For acrylic, use a mild soap solution and avoid strong chemicals that can cause surface crazing. The goal is simple: remove any surface contaminants that could burn, vaporize, or react under the laser beam.
2. Protective Coatings – Applying a temporary, removable coating can act as a thermal barrier, shielding the surface from heat-induced tinting. For metals, specialized laser-safe protective sprays are available that reduce oxidation during cutting.
3. Masking Films – Pre-applied adhesive masking films are one of the best defenses against cosmetic edge damage. They protect the surface during cutting and can be peeled away afterward to reveal a clean, untouched finish. For stainless steel or brushed aluminum, this step can mean the difference between delivering a high-end, ready-to-ship part and one that needs costly post-processing.
Investing a few minutes in proper material preparation pays off in cleaner edges, less rework, and happier customers.
Adjusting Laser Settings to Minimize Burn
Even with perfect material prep, poor laser settings can still lead to laser cut edge discoloration. The right combination of gas type, pressure, speed, and power is critical for achieving a clean, burn-free edge.
1. Gas Type and Pressure – Oxygen assist gas is fast and efficient but promotes oxidation, leading to yellow or brown edges—especially on stainless steel. Switching to nitrogen greatly reduces oxidation, producing cleaner, silver edges. However, nitrogen requires higher pressure (often 150–250 psi) and can increase costs. Balancing pressure is key: too low and you’ll get dross; too high and you risk micro-pitting.
2. Speed and Power Balance – Running too slow or with excessive power increases heat input, enlarging the heat-affected zone and deepening discoloration. Increasing speed while reducing power minimizes thermal buildup but still needs to maintain complete cut-through. For example, a slight bump in speed combined with a 5–10% power reduction can significantly improve edge appearance without sacrificing quality.
Fine-tuning these settings requires testing, but once dialed in, you’ll see dramatically cleaner cuts—and far less need for post-processing.
Post-Processing Options for Clean Edges
Even with perfect preparation and optimized cutting settings, laser cut edge discoloration can still happen—especially with sensitive materials like stainless steel or acrylic. That’s where post-processing comes in.
1. Polishing – For metals, mechanical polishing can restore a bright, uniform finish while removing light oxidation. A buffing wheel or fine abrasive pad works well for flat parts, while small tools can handle intricate shapes.
2. Sanding – Fine-grit sanding (800–1200 grit) helps remove deeper discoloration and blends the cut edge into the surrounding material. Wet sanding is preferred for acrylic to avoid heat buildup and surface crazing.
3. Chemical Treatments – Stainless steel responds well to pickling pastes or passivation solutions that dissolve oxides and restore corrosion resistance. Acrylic edges can be treated with a vapor polishing process to bring back transparency and smoothness.
While post-processing adds time, it can turn a cosmetically flawed part into one that meets high-end visual and functional standards—without scrapping valuable material.
Conclusion
Laser cut edge discoloration is more than just a cosmetic headache—it can impact part performance, perceived quality, and even customer trust. The good news? With the right preparation, settings, and post-processing, it’s entirely manageable.
Recommendations by Material Type:
-
Stainless Steel – Use nitrogen assist gas to avoid oxidation, apply masking films, and finish with passivation if needed.
-
Carbon Steel – Oxygen cutting is common, but minimize dwell time to reduce dark, sooty edges. A light sanding or polishing restores appearance.
-
Acrylic – Keep cutting speed high to reduce yellowing. Leave the protective film on during cutting and use vapor polishing for crystal-clear edges.
Think of discoloration prevention as a process, not a quick fix. Start with clean, well-prepared material, fine-tune your laser settings, and verify results with small test runs before scaling production. Over time, you’ll find the sweet spot that delivers both speed and flawless finish—every single cut.